Face Mask

Face Mask

Monday, August 24, 2020

Garlic Ranch Chicken Skewers

We’re excited to partner with Reynolds Wrap® for this sponsored recipe

Garlic Ranch Chicken Skewers are the perfect way to enjoy kabobs this summer. Get grilling with this easy to make chicken that has all the flavor on each skewer!

Reynolds Wrap® Non-Stick Foil makes clean up much easier and is great for sticky food because it won’t get stuck on the pan. Grilled Citrus Salmon with Pineapple Salsa, Easy Mini Burritos or Grilled Pizza are even more great recipes to try with Reynolds Wrap®.
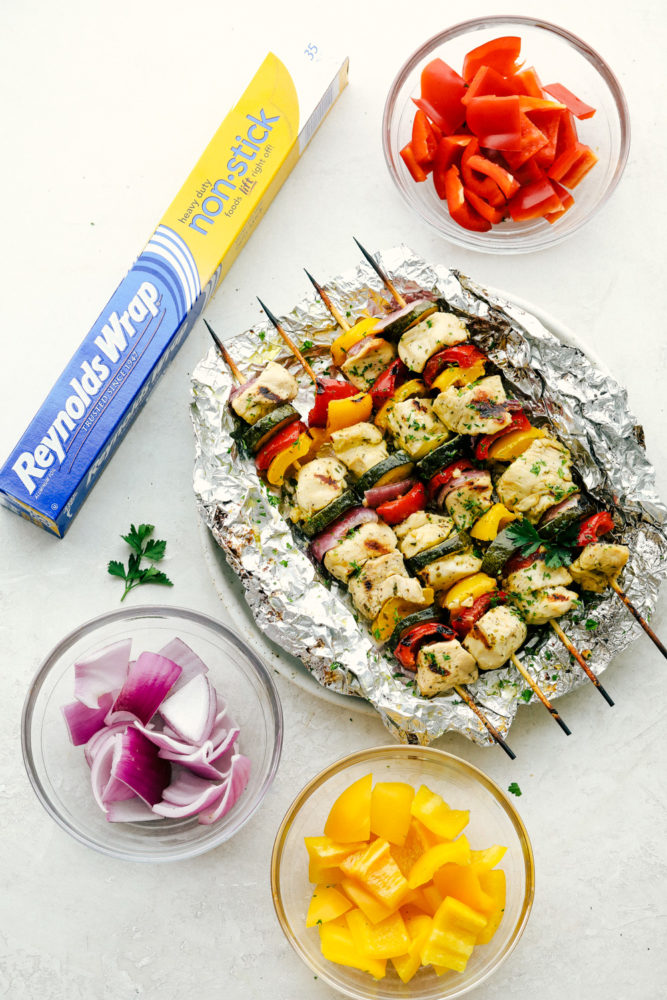
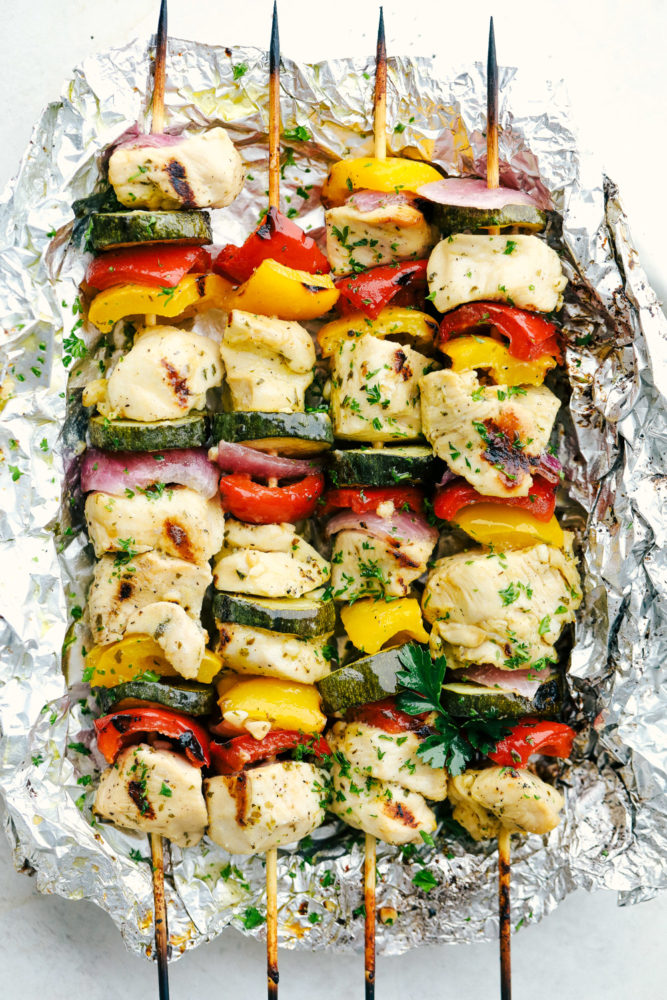
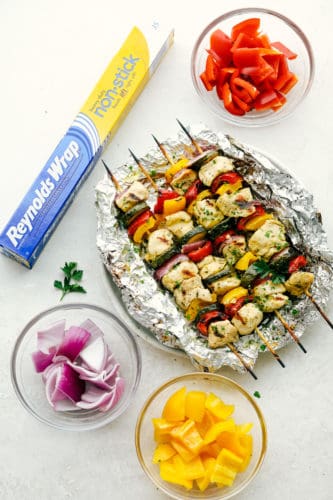
Chicken skewers laying on Reynolds wrap with bell peppers and onions in separate glass bowls.

Grilled Garlic Ranch Chicken Skewers

Start your evening off with a delicious and simple dinner. I love making skewers on the grill in the summer time. It is quick and easy to assemble and add right onto the grill. The chicken has a nice garlic ranch flavoring and becomes tender and juicy once cooked. Add vegetables on the skewers to add flavor and a soft, crunchy texture that completes the meal. The chicken and vegetables make the perfect combination!

With the help of Reynolds Wrap® Non-Stick Foil, the skewers are assembled and laid flat on the Reynolds Wrap® non stick foil. To help keep the grill clean and free from the chicken sticking or the vegetables falling through the grates. Reynolds Wrap® Non-Stick Foil will cook the chicken skewers perfectly, giving it a steamy covering while grilling it from the inside out, without any of the chicken and vegetables getting stuck to the foil. These garlic ranch chicken skewers are so tender and flavorful your family is going to be begging for more.

Garlic Ranch Chicken Ingredients:

Easy ingredients that are always on hand. Cut the chicken into the same size for the best cooking. Slice the vegetables to a similar size and add them in-between the chicken. Together the garlic ranch flavor and Reynolds Wrap® Non-Stick Foil will create the perfect dinner!

  • Dry Ranch Dressing Mix: Simple way of adding the most flavor to your chicken.
  • Olive Oil: Mix well with the dressing to create a baste that can be brushed over the chicken and vegetables.
  • Apple Cider Vinegar: Gives a sweet and spicy taste to the ingredients.
  • Garlic: Adds some intense flavoring over the chicken skewers.
  • Chicken: Cut into 1 inch chunks of pieces.
  • Bell Peppers, Red Onion and Zucchini: Chop evenly and flat to be able to slide onto the skewers evenly.
  • Reynolds Wrap® Non-Stick Foil: Create a grill packet using foil to help cook, grill and steam the chicken and vegetable skewers.
  • Wooden Skewers: Great for holding onto the chicken and vegetables while cooking.

Let’s Grill Some Chicken Skewers!

A trick using the Reynolds Wrap® non stick foil is to make a grill shield by folding a sheet of foil in thirds like a business letter. Slip it under the exposed parts of bamboo skewers when grilling kebabs to help keep them from burning.

  1. Whisk Together Ingredients: Preheat grill to medium-high heat.  In a large bowl whisk together the dry ranch mix, olive oil, apple cider vinegar and garlic.  Add in the chicken, red bell pepper, yellow bell pepper, red onion and zucchini and toss to coat.
  2. Prepare Skewers: Lay down a sheet of foil with the dull side up.  Thread the chicken and vegetables onto the wooden skewers.  Lay evenly across the foil.  Fold up the edges and tightly close around the skewers.
  3. Grill the Chicken Skewers: Place the foil pack on the fire or grill.  Let the kaboobs grill on each side about 5-7 minutes, or until chicken is cooked throughout and no longer pink.
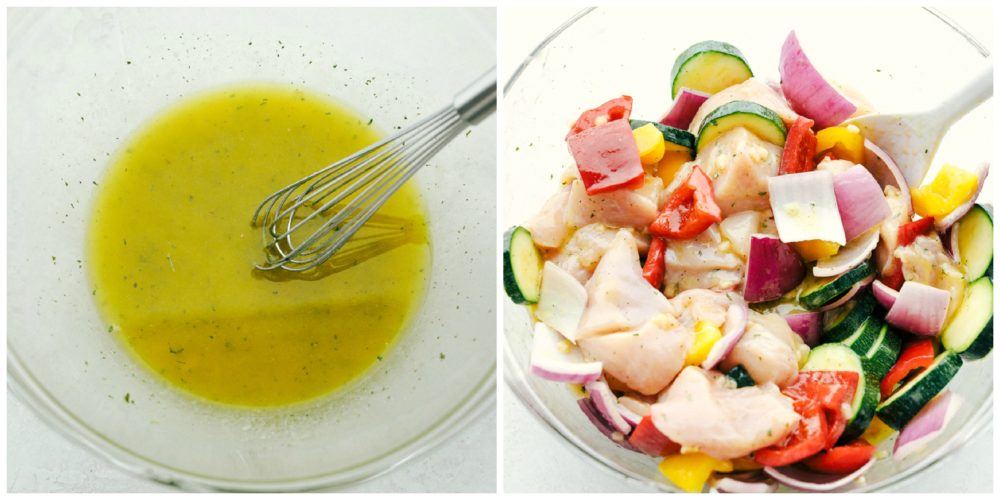
Two photos next to each other. One with the garlic ranch seasoning mix and the other photo with the chicken and vegetables being stirred together with the mix.

How Long Do You Soak Bamboo Skewers?

It is best to soak bamboo or wooden skewers for about 30 minutes long. You can even soak them overnight in water. Well, soaked skewers will last longer on the grill without burning up the ends of the sticks.
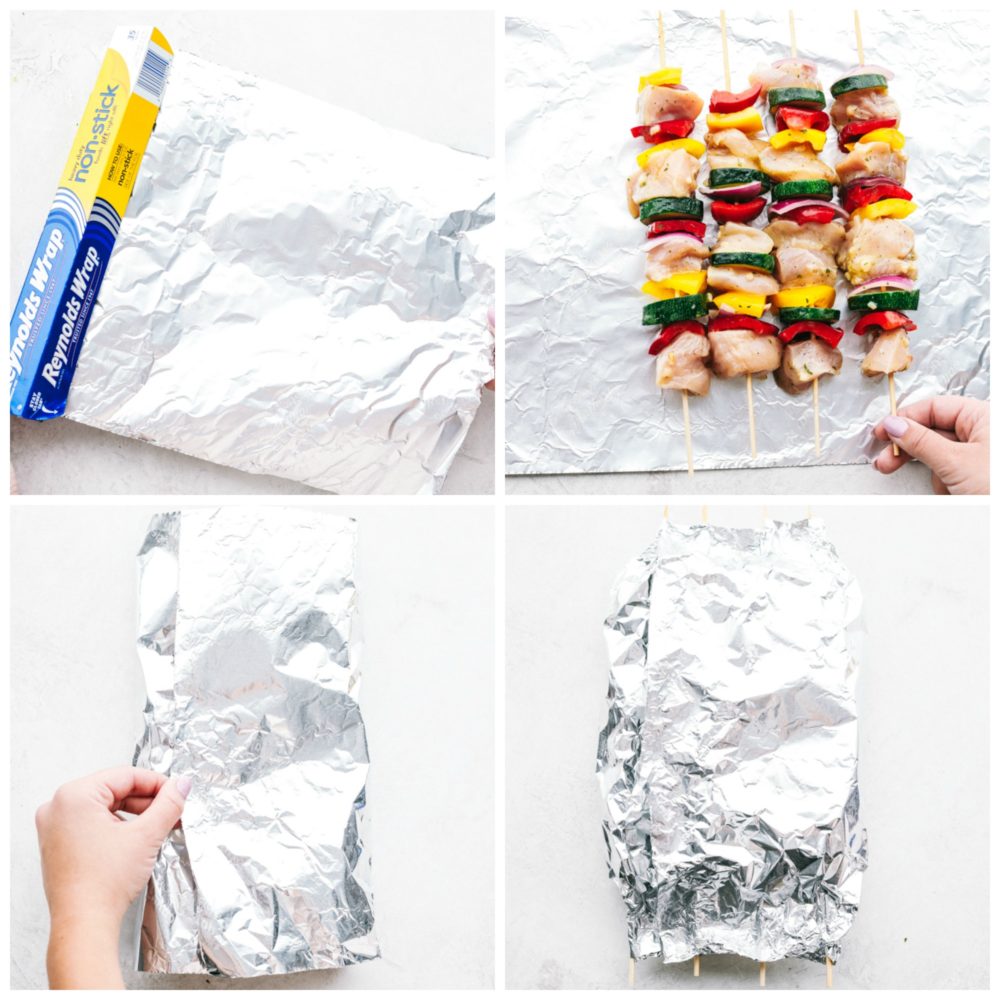
Four photos being used in the process of making chicken skewers with Reynolds wrap foil packet.

Chicken skewers wrapped in foil.

What Temperature Do You Grill Skewers At?

Chicken is grills quickly! Place the chicken skewer foil packet on the grill directly. Prepare the grill for direct heat grilling over medium to medium-high heat. This ranges from 350 to 450 degrees Fahrenheit depending on the grill. Allow the grill to preheat for about 10 to 15 minutes. Use a meat thermometer to determine if your chicken is cooked through properly before taking it off the skewers.
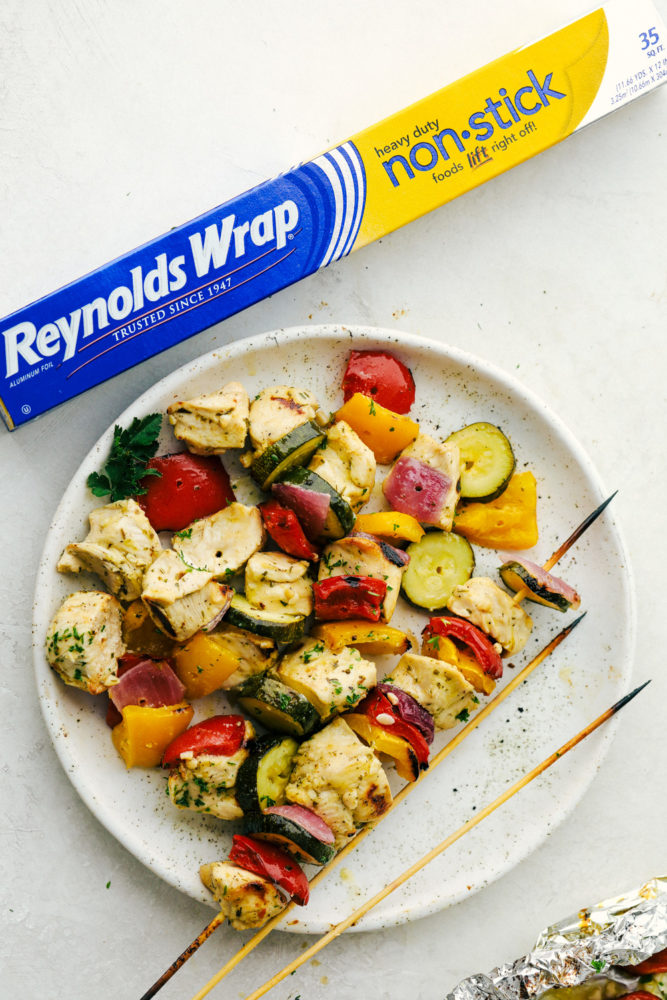
Chicken and vegetables on a white plate with Reynolds wrap box on the side.

More MUST Try Skewer Recipes:

Print

Garlic Ranch Chicken Skewers

Garlic Ranch Chicken Skewers are the perfect way to enjoy kabobs this summertime. Get grilling with this easy to make chicken that has all the flavor on each skewer!
Course Dinner, Main Course
Cuisine American
Keyword chicken skewers
Prep Time 15 minutes
Cook Time 15 minutes
Total Time 30 minutes
Servings 4 People
Calories 403kcal
Author Alyssa Rivers

Ingredients

  • 1 package dry ranch dressing mix
  • 1/2 cup olive oil
  • 1/4 cup apple cider vinegar
  • 3 cloves garlic minced
  • 1 pound of chicken cut into 1 inch squares
  • 1 red bell pepper cut into 1 inch squares
  • 1 yellow bell pepper cut into 1 inch squares
  • 1 red onion cut into 1 inch squares
  • 1 zucchini sliced
  • Reynolds Wrap® Non-Stick Foil
  • 4-5 wooden skewers

Instructions

  • Preheat grill to medium high heat. In a large bowl whisk together the dry ranch mix, olive oil, apple cider vinegar and garlic. Add in the chicken, red bell pepper, yellow bell pepper, red onion and zucchini and toss to coat.
  • Lay down a sheet of Reynolds Wrap® Non-Stick Foil with the dull side up. Thread the chicken and vegetables onto the wooden skewers. Lay evenly across the foil. Fold up the edges and tightly close around the skewers.
  • Place the foil pack on the fire or grill. Let grill on each side about 5-7 minutes, or until chicken is cooked throughout and no longer pink.

Nutrition

Calories: 403kcal | Carbohydrates: 21g | Protein: 4g | Fat: 34g | Saturated Fat: 6g | Cholesterol: 9mg | Sodium: 1330mg | Potassium: 369mg | Fiber: 2g | Sugar: 4g | Vitamin A: 1295IU | Vitamin C: 104mg | Calcium: 37mg | Iron: 2mg


from The Recipe Critic https://ift.tt/34rQM8B
via babu31blog

COVID response helped NT Labor, encouraging Palaszczuk and McGowan to stick to their scripts

NT Labor, led by Michael Gunner, is expected to form a majority government, the ABC has reported today. And Labor’s election victory is likely to strengthen the resolve of other states to keep their borders closed, writes Michelle Grattan her ‘View from the Hill’ column in The Conversation.  This article was [...]

from Croakey https://ift.tt/31nkutp
via babu31

Strategies to stop Emotional Eating

Have you ever entered ‘unsupervised child at a party’ mode when you’ve been sad, annoyed or stressed? What I mean by that is, have you ever over eaten as a way to deal with your feelings? Is emotional eating something you still tend to do? Portrait of a little surprised girl with curly hair, and two mouth-watering donuts in her hands, closes her eyes with donuts, on a pink background Emotional eating is something that I’ve struggled (and sometime still struggle!) with, and I know most of us, at one time or another have reached for the Tim Tams to chocolate coat those unhappy feelings. Let’s be honest, it works a treat – who doesn’t love a bit of comfort food! But it isn’t really a sustainable way to manage yourself and doesn’t comfort for long.

Over the years I’ve been working on strategies to stop emotional eating. It’s taken me years because a) I’m human and b) bad habits are BLOODY hard to completely break away from. I’ve definitely made huge improvements but I think I am always going to have to be mindful of it when I am stressed. I thought I would share some of the tips and strategies I draw on to manage and stop emotional eating, in case they help you too.

How to stop emotional eating

1. Bring awareness to the times you emotional eat

When, where, why.

Step 1 – move away:

Next time you are tempted to smother your emotions with food, try to remove yourself from the situation that caused the feelings (eg. if seeing a pile of papers you need to work on your desk caused high levels of stress, then try only keeping what you’re working on at present on your desk) and/or the environment that encourages it (ie. step away from the pantry).

Step 2 – Find an alternative:

When you’re not stressed, note what things make you feel relaxed and happy eg. stepping outside for some fresh air, saying a prayer of thanks, doing your nails, walking your dog etc. Or simply just put on some good tunes and take five minutes for a boogie (here are some tunes to get you going). Write your ideas on a list and refer to this next time you find yourself wanting to emotional eat – do one of these things instead. Trust me – distractions work.
An alternative at this point is to try meditation to manage your emotions. I’ll be honest, I’m not the best at practicing this regularly, but I find it very effective when I do! You can learn more about how to do this here.

Step 3 – PRACTICE:

Put it into practice. Immediately after the distraction, there will be a period of feeling uncomfortable and unsatisfied – even if you follow these tips… but just accept that. Take comfort in knowing that you’re on the road to getting rid of that feeling and that you are creating new, healthy habits. Just keep focusing on that thing you enjoy from your list. The desire to emotional eat will pass. Ride it out. Know you have the strength to say no. YOU’RE mind is the boss of your emotions, even if the emotions jump up and down about it 😉

Improving your awareness through mindful eating will support you in putting this into practice.

Step 4 – follow up:

Follow yourself up! You might want to flag this post to reflect on again later in the week and see if you can complete each step. You could even forward it to a friend who would also find this list helpful. Ask them to check in with you to see how you are progressing with your awareness of emotional eating or how your relaxation list is going. When we do life together and build each other up, it gives amazing results.

The post Strategies to stop Emotional Eating appeared first on Eat Pray Workout.


from Eat Pray Workout https://ift.tt/32kPae1
via babu31

Leah Itsines' Peanut Butter Protein Ball Recipe Proves the Perfect Healthy Snack Does Exist

Following the success of her first BARE guide and inspired by her own weight loss journey, Leah Itsines is launching two new guides, BARE Lean - Become Lean and BARE Lean General Healthy Eating Guide.

BARE Lean is designed to place users in an energy deficit (i.e. burning more energy than they consume) with over 120 recipes that include crowd favourites like burgers, pasta and pizza, each one is individually tailored to be healthy portions. The program also includes educational resources, customisable shopping lists and meal planners, interactive progress and accountability trackers, online support, and 30 exclusive workouts.

To celebrate the launch, Leah has shared her peanut butter protein ball recipe with POPSUGAR Australia so we can get a little taste of what to expect from her new BARE Lean Program.

Scroll for the recipe and watch Leah's tutorial here.

Peanut Butter Protein Balls

Leah Itsines BARE Lean Plan

Notes

This recipe serves 5 so you could make 10 large balls and have 2 at a time or you could make 15 smaller balls and have 3 at a time.

Ingredients

  1. 30g vanilla or neutral protein powder
    100g peanut butter
    60ml honey
    100g instant oats
    1 tablespoon cacao powder
    6 Medjool dates, pitted and soaked
    1 tablespoon coconut oil, melted

Directions

  1. In a food processor, blend together all the ingredients.
  2. Portion the mixture into tablespoon quantities and roll into balls.
  3. Place the balls on a tray and refrigerate until set.
  4. If you're not going to eat all of the protein balls straight away or within a few days you can always freeze these in an airtight container for up to a month and defrost as needed.


from POPSUGAR Health & Fitness https://ift.tt/2EqRFDB
via babu31

Leah Itsines' Peanut Butter Protein Ball Recipe Proves the Perfect Healthy Snack Does Exist

Following the success of her first BARE guide and inspired by her own weight loss journey, Leah Itsines is launching two new guides, BARE Lean - Become Lean and BARE Lean General Healthy Eating Guide.

BARE Lean is designed to place users in an energy deficit (i.e. burning more energy than they consume) with over 120 recipes that include crowd favourites like burgers, pasta and pizza, each one is individually tailored to be healthy portions. The program also includes educational resources, customisable shopping lists and meal planners, interactive progress and accountability trackers, online support, and 30 exclusive workouts.

To celebrate the launch, Leah has shared her peanut butter protein ball recipe with POPSUGAR Australia so we can get a little taste of what to expect from her new BARE Lean Program.

Scroll for the recipe.


from POPSUGAR Health & Fitness https://ift.tt/32e13Ta
via babu31

[Transcript] – Age-Reversal Tips: You Can Be Younger (How To Use The Power Of Your Mind to Look & Feel 10 Years Younger).

From Podcast: https://ift.tt/3aNsVBB [00:00:00] Introduction [00:01:13] Podcast Sponsors [00:06:56] Guest Introduction [00:11:28] Why Ben And Marisa Will Never “Retire” [00:13:38]

The post [Transcript] – Age-Reversal Tips: You Can Be Younger (How To Use The Power Of Your Mind to Look & Feel 10 Years Younger). appeared first on Ben Greenfield Fitness - Diet, Fat Loss and Performance Advice.


from Ben Greenfield Fitness – Diet, Fat Loss and Performance Advice https://ift.tt/3hpBNQ6
via babu31

Fudgy Sourdough Chocolate Brownies

These Fudgy Sourdough Chocolate Brownies are a very decadent way to use up discarded sourdough starter. They aren’t an every day snack, more of a celebration treat. Seeing we are welcoming new members into the family, and with Father’s Day coming up, I thought I’d better fast-track this simple recipe. I’ve been working on producing…

This content is for members only. Visit the site and log in/register to read.


from Well Nourished https://ift.tt/31kC6Gl
via babu31

Simple Healthy Congee

This Simple Healthy Congee is a nourishing Asian-style rice porridge made extra nutritious by including brown rice and shiitake mushrooms. Plain congee is often served as a side dish, but with extras like mushrooms and radishes in this one, it’s perfect to eat by itself. In some Asian countries, congee is considered a breakfast food,…

This content is for members only. Visit the site and log in/register to read.


from Well Nourished https://ift.tt/2EmW1vz
via babu31

Apple Almond Breakfast Slice

Breakfasts can be such a challenge on busy mornings. In the rush of getting into the day, a pre-made breakfast that is both sustaining and enjoyable to eat is sure to make mornings easier! This Apple Almond Breakfast Slice is full of amazing ingredients and such a far cry from the processed cereal aisle! Of…

This content is for members only. Visit the site and log in/register to read.


from Well Nourished https://ift.tt/3l9gPat
via babu31

Weighing up the potential benefits and harms of comprehensive full body health checks

Most people are familiar with the concept of undergoing general health checks. This might mean that your doctor talks to you about your medical history and lifestyle including diet, physical activity, alcohol intake and smoking history. This is part of providing holistic care to identify and address risk factors to [...]

from Croakey https://ift.tt/31mIxbZ
via babu31

Latest CroakeyVOICES podcast presents a vision for rural health

While people living in rural and remote parts of Australia have higher rates of heart disease, hospitalisations and poorer access to primary health care services than those in metropolitan areas, the new Rural Health Commissioner Associate Professor Ruth Stewart believes they also have the solutions, tapping into their own talent [...]
from Croakey https://ift.tt/3aOm6PY
via babu31

Sunday, August 23, 2020

Are You Still Watching?: Hindi Cinema and Storytelling in the Netflix Era

A conversation with directors Anvita Dutt (Bulbbul), Neeraj Udhwani (Maska), Honey Trehan (Raat Akeli Hai) and Sharan Sharma (Gunjan Saxena: The Kargil Girl). Moderated by Anuj Malhotra, founder of Lightcube

from Verve Magazine https://ift.tt/2YpY3Cb
via babu31

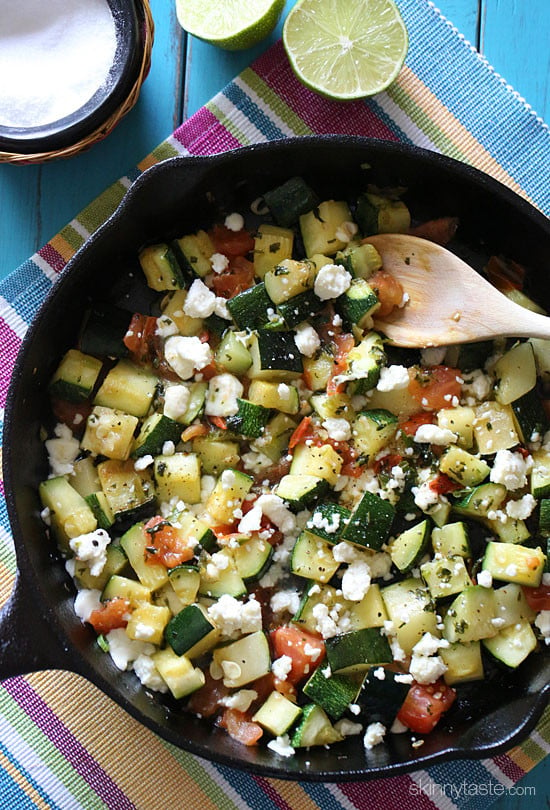
Skillet Mexican Zucchini

Skillet Mexican Zucchini is incredibly delicious with a little bit of a kick from the jalapeño topped with melted queso blanco. So easy and quick, a must try!

This zucchini is incredibly delicious with a little bit of a Mexican kick from the jalapeno then topped with melted queso blanco. It's also easy and quick, a must try!
Mexican Zucchini

I can’t get enough of zucchini in the summer, in fact I have an entire section of Zucchini Recipes in my index if you need more ideas.

(more…)

The post Skillet Mexican Zucchini appeared first on Skinnytaste.


from Skinnytaste https://ift.tt/2EsgeA0
via babu31 blog

Slow Cooker Brown Sugar Balsamic Glazed Pork

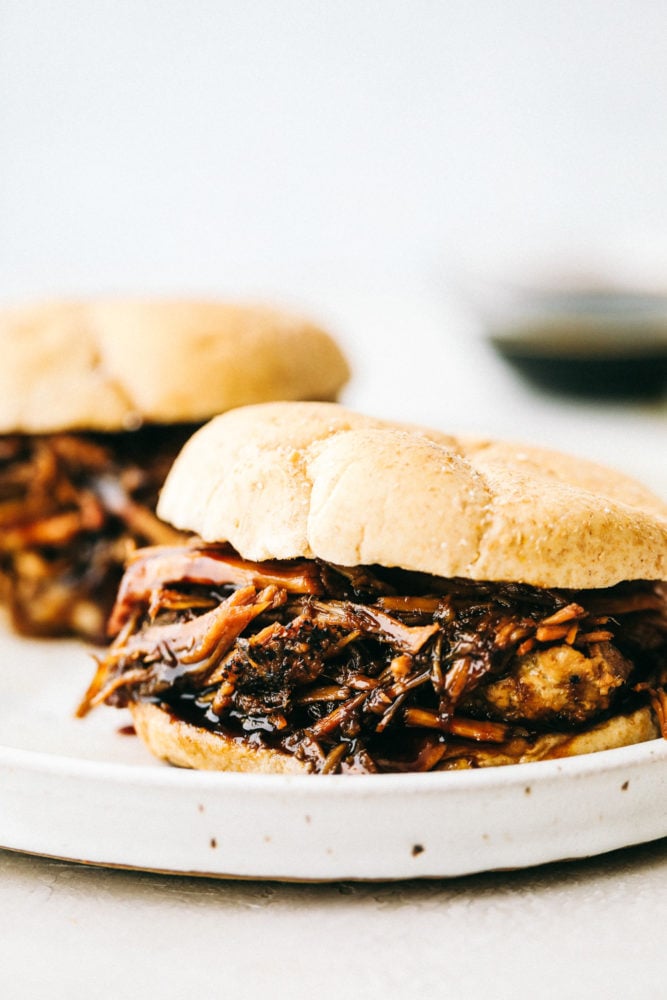
This juicy, melt in your mouth brown sugar balsamic glazed pork is an explosion of flavor. With simple ingredients, easy prep and taste that wows, this dish will make you the hit of the dinner table. You will dream about this pork after you make it.  It’s just that good!

Making quick slow cooker sandwiches are a MUST in the summer! If you love sandwiches as much as we do try these favorites: Slow Cooker French Dip Sandwiches and Slow Cooker Chicken Caesar Sandwiches.

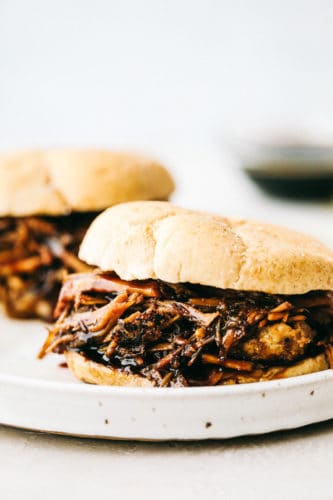
Brown sugar balsamic glazed pork in a bun.

Brown Sugar Balsamic Glazed Pork

This is one of those recipes that you have to try. You throw it into the crockpot and let it work its magic. By the time it was finished and I pulled it out it was falling apart because it was so tender. But you are going to LOVE this glaze. It will still be fantastic.

The combination of brown sugar and balsamic vinegar are a match made in saucy heaven. We poured some of the sauce over the meat before making the sandwiches to make them extra juicy. This sauce would be sublime served as a gravy over rice or potatoes as well. Cooking the meat on low ensures a nice tender meat. If your crockpot cooks hot, add extra water or broth to avoid burning.

Brown Sugar Glazed Pork Ingredients:

Slow cooker pork is so simple to make and comes together quickly. Tender pork for a sweet and savory dinner! Place everything in the slow cooker and let it work its magic!

  • Pork Tenderloin: You can also substitute pork shoulder or pork butt for these sandwiches
  • Salt: Don’t skimp here, it helps to bring out flavor and tenderize the meat.
  • Coarse Pepper: If you don’t have coarse regular pepper will work here too.
  • Minced Garlic: For faster prep use jarred minced garlic.
  • Brown Sugar: Try dark brown sugar for an extra zing of flavor
  • Cornstarch: This will thicken the sauce for you.
  • Balsamic Vinegar: This can usually be found in your local grocery store next to apple cider vinegar.
  • Soy Sauce: You can use low sodium soy sauce here if you want.
  • Water: You’ll use half a cup in the crockpot with the pork and half a cup in the sauce.

How to Make Glazed Pork:

First sear the pork to create a crispy outside with a tender inside. Create a sauce that is irroestiable then place it all together in a slow cooker.

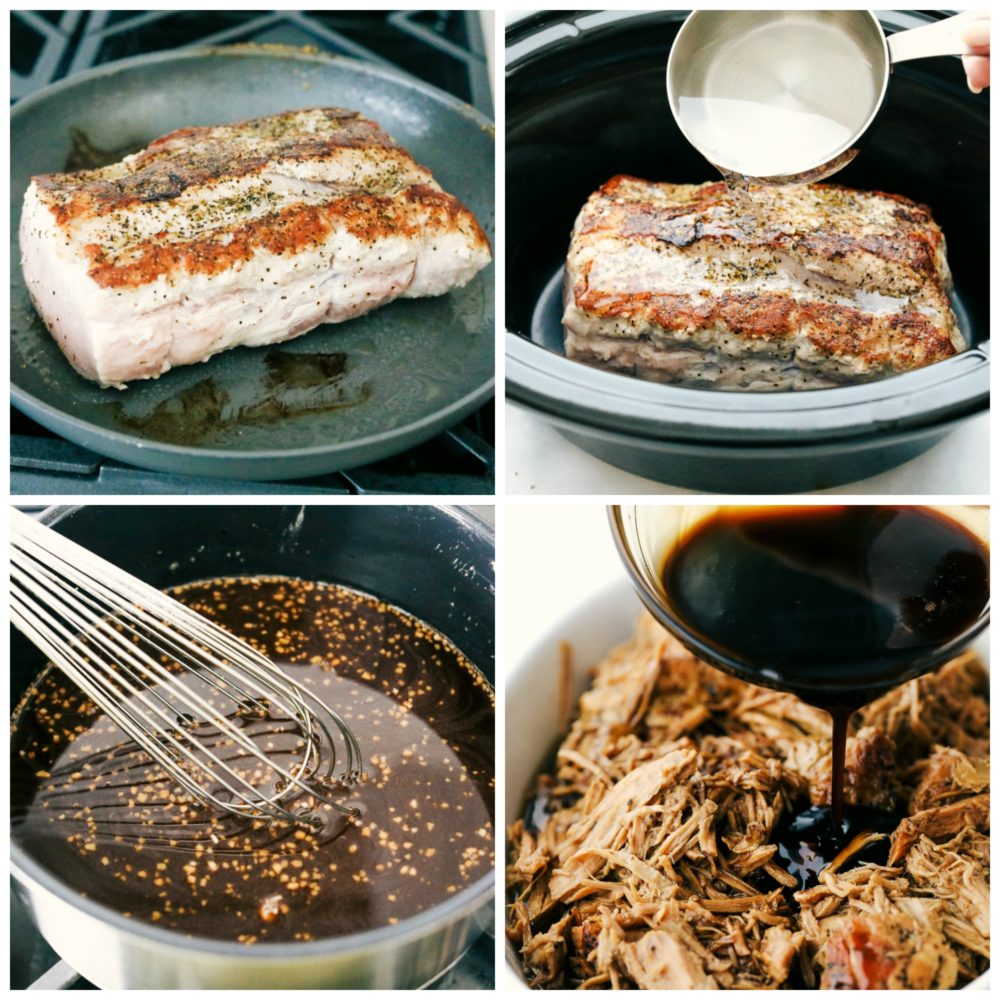
  1. Sear Roast:  Rubbing in the salt and pepper ensures flavor and tenderizing. Rub the salt and pepper over the pork tenderloin. If you are pan searing it, heat 2 T olive oil in a skillet over medium high heat. Let each side get very dark brown about 1-2 minutes. 
  2. Add ingredients to Slow Cooker : Add 1/2 cup of water to the crockpot and place the pork inside.Cook the pork on low for 6-8 hours.
  3. Make Sauce:The last hour of cooking, in medium saucepan mix together garlic, 1/2 cup water, brown sugar, cornstarch, balsamic vinegar, and soy sauce together. Bring to a boil and reduce the heat to medium low and stir until the glaze thickens. Slowly add more cornstarch if needed.
  4. Glaze in Oven: Brush the roast with the glaze 2-3 times the last hour of cooking. To get the caramelized crust, remove the pork roast from the crockpot and place on an aluminum foil lined pan. Brush more of the glaze on top and broil on high for 2-3 minutes until the desired crust is achieved.
  5. Shred: With two forks shred the pork. Serve with remaining glaze on the side.

The process of cooking pork and slow cooking it.

Tips and Variations for this Slow Cooker Dish:

These simple tips and variations will help guide you to making the best pork for dinner!

  • Meat: This can be made using chicken breasts or boneless skinless chicken thighs even use a beef chuck roast.
  • Cook Longer: Let the sauce cook with the roast for 15 min up to 30 min for added richness.
  • Shredding Meat: Shred the meat on a cookie sheet covered with aluminum foil, poor sauce over the top and broil for a caramelized dark crust along the top
  • Broth: Use beef broth or vegetable broth instead of water to cook the roast in.
  • Try it with an Instant Pot: This can also be done in an instant pot, add an extra half a cup of water or cook it in the sauce. Set the Instant Pot to high pressure for 45 minutes. Keep in mind you need to allow extra time for it to come to pressure and to naturally release for 15 minutes.

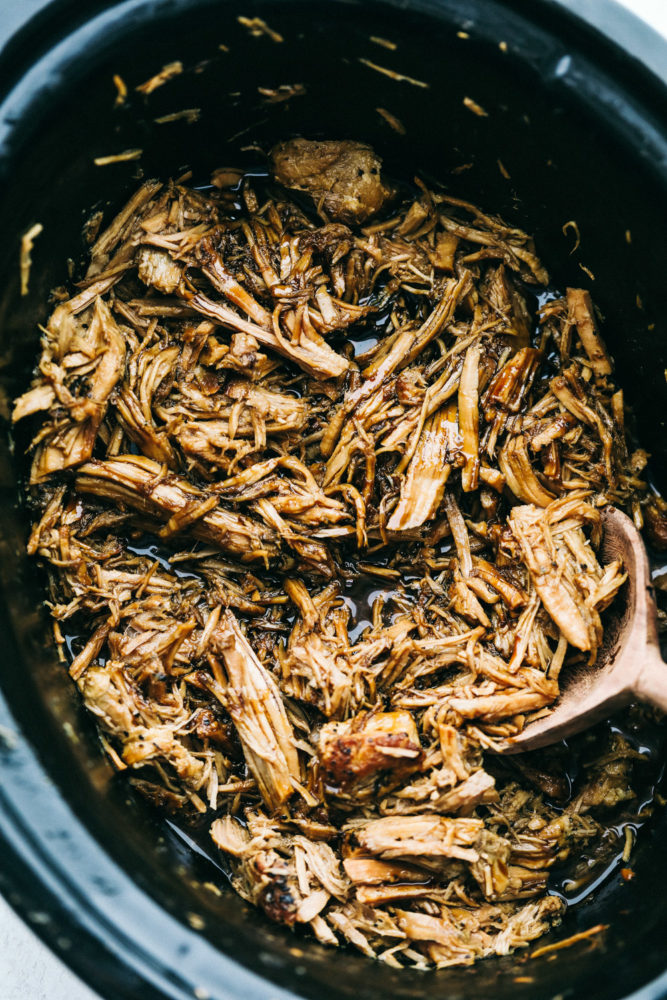
Shredded pork in a slow cooker being stirred with a wooden spoon.

Storing Slow Cooker Pork:

This pork is so easy to make and perfect for making a large crowd. Make this ahead of time and easily warm it up when ready to serve!

  • Make Ahead: This is so easy to make ahead of time and warms up perfectly. Store in the refrigerator for 4 to 5 days in an airtight container.
  • Freezing Pork: Let the meat cool, then place in an airtight container or ziplock bag. Let out access air and lay flat in the freezer. When ready to serve, place in the refrigerator over night.
  • Warming Up: Place in the slow cooker, reheat in the microwave or cook it in the oven until warmed through.

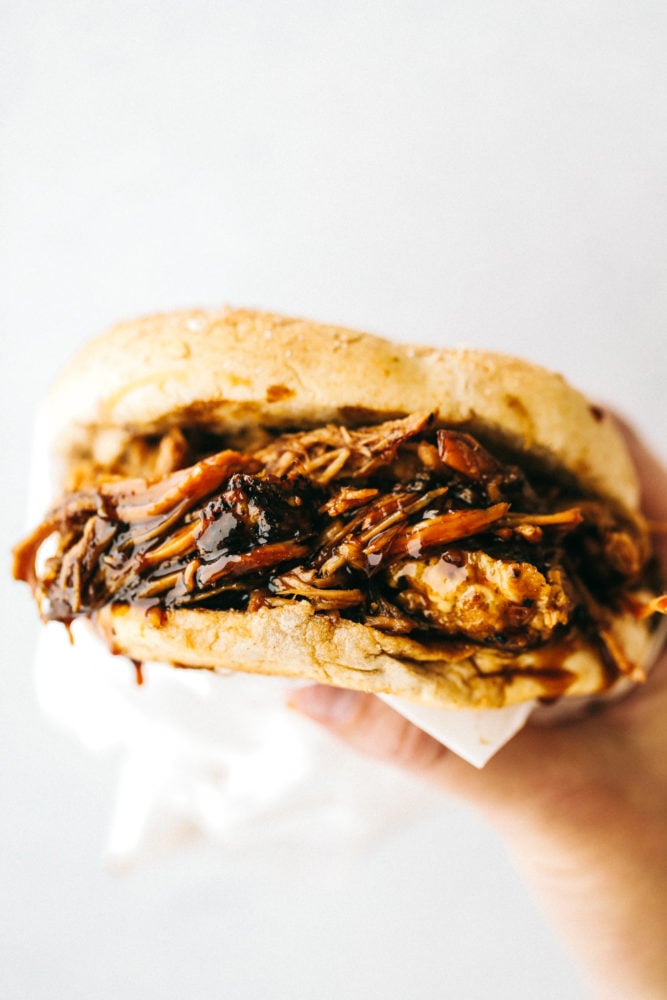
Pork sandwich sitting on a white plate.

More Amazing Crockpot Recipes to Try:

  • Pork Carnitas 
  • Skinny Pulled Pork Barbacoa
  • Beef Carnitas Tacos
  • Asian Pulled Pork
  • Cafe Rio {Copycat} Sweet Pulled Pork
Print

Slow Cooker Brown Sugar Balsamic Glazed Pork

This juicy, melt in your mouth brown sugar balsamic glazed pork is an explosion of flavor. With simple ingredients, easy prep and taste that wows, this dish will make you the hit of the dinner table. You will dream about this pork after you make it.  It's just that good!
Course Dinner, Main Course
Cuisine American
Keyword slow cooker glazed pork
Prep Time 20 minutes
Cook Time 6 hours
Total Time 6 hours 20 minutes
Servings 6 Servings
Calories 353kcal
Author Alyssa Rivers

Ingredients

  • 2-3 pounds Pork tenderloin
  • 1 teaspoon salt
  • 1/2 teaspoon coarse pepper
  • 1 teaspoon minced garlic
  • 1/2 cup Water
  • 1 cup Brown sugar
  • 1-2 tablespoon Cornstarch
  • 1/2 cup Balsamic Vinegar
  • 1/2 cup Water
  • 4 tablespoons Soy sauce

Instructions

  • Rub the salt and pepper over the pork tenderloin. If you are pan searing it, heat 2 Tablespoons olive oil in a skillet over medium high heat. Let each side get very dark brown about 1-2 minutes. Add 1/2 cup of water to the crockpot and place the pork inside.
  • Cook the pork on low for 6-8 hours. The last hour of cooking, in medium saucepan mix together garlic, 1/2 cup water, brown sugar, cornstarch, balsamic vinegar, and soy sauce together. Bring to a boil and reduce the heat to medium low and stir until the glaze thickens. Slowly add more cornstarch if needed.
  • Brush the roast with the glaze 2-3 times the last hour of cooking. To get the caramelized crust, remove the pork roast from the crockpot and place on an aluminum foil lined pan. Brush more of the glaze on top and broil on high for 2-3 minutes until the desired crust is achieved.
  • With two forks shred the pork. You can serve with rice, potatoes, or in sandwiches. Serve with remaining glaze on the side.

Notes

Updated on August 23, 2020
Originally Posted on October 10, 2013

Nutrition

Calories: 353kcal | Carbohydrates: 42g | Protein: 33g | Fat: 5g | Saturated Fat: 2g | Cholesterol: 98mg | Sodium: 1154mg | Potassium: 692mg | Fiber: 1g | Sugar: 39g | Vitamin C: 1mg | Calcium: 48mg | Iron: 2mg


from The Recipe Critic https://ift.tt/3gjKRVn
via babu31blog

Keto Maple “Oatmeal” Breakfast Cookies

These easy keto breakfast cookies are simple to make and taste like maple oatmeal. A delicious way to start your day off right. Cookies for breakfast that taste like your favorite oatmeal, topped with brown sugar and maple syrup? Sign me up! But of course, these keto breakfast cookies contain no oatmeal, no brown sugar,...

from All Day I Dream About Food https://ift.tt/2QgIiZR
via babu31

Sabbath Ramblings: Hope.

Ah, how complex is the ever-evolving science of self-quantification! In a past Sabbath Rambling, I tackled the world of wearables—and

The post Sabbath Ramblings: Hope. appeared first on Ben Greenfield Fitness - Diet, Fat Loss and Performance Advice.


from Ben Greenfield Fitness – Diet, Fat Loss and Performance Advice https://ift.tt/34oBd1x
via babu31

What I Love This Week

James blueberry pickingThis week it was finally cool enough so that I could enjoy time outside without feeling like I’m going to ...

from Andie Mitchell https://ift.tt/2YnK0gs
via babu31

Saturday, August 22, 2020

Crispy Potato Skins

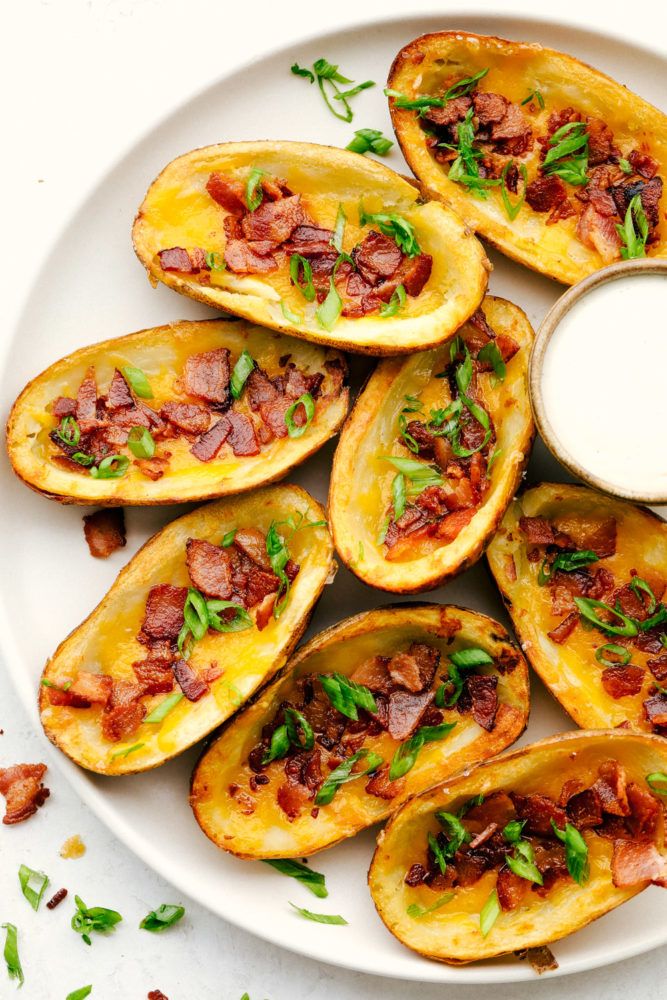
Baked Potato Skins have a crispy outer shell that is loaded with a cheddar cheese, bacon and green onion combination. These potatoes are everyones favorite appetizer or side dish!

Bring on the appetizers with these delicious skins and watch them disappear quickly! For more classic appetizers try this Crispy Onion Rings, Spinach Artichoke Dip or Mouthwatering Cowboy Caviar.

Potato skins on a white plate with ranch dipping sauce on the side.

Crispy Potato Skins

These homemade potato skins are so simple to make and come together so quickly for your next dinner or party. Make the perfect side dish with all the flavor and watch them disappear quicker than you made them. Potato skins are a MUST make!

Serve these skins as a fun game night appetizer or enjoy them with as a side with your favorite meat. The crispy outside gives a nice shell that is easily hand held for dipping or tender enough to cut through with a fork. This appetizer is one of the best and so delicious!

Homemade Potato Skins Ingredients:

Russet potatoes are known to be thicker and hold together the best for these potatoes. They are a stronger potato to cut and hollow out. Stuff your potato with all the goods and bake until perfection!

  • Potatoes: Russet potatoes are the best because there larger and 
  • Olive Oil: This coats the skins of the potatoes and creates a crispy outside.
  • Salt and Pepper: To Taste!
  • Cheddar Cheese: Sprinkle over top of the baked potato.
  • Bacon: Cook and crumble pieces.
  • Green Onions: Chop and add to the top.
  • Ranch or Sour Cream: Great for dipping or loading the potato skins.

How to Make a Classic Appetizer:

This appetizer or side dish is one of the best and easiest recipes to make for a quick dish to serve. Cut and carefully hallow out each potato skin. This recipe is great even for doubling!

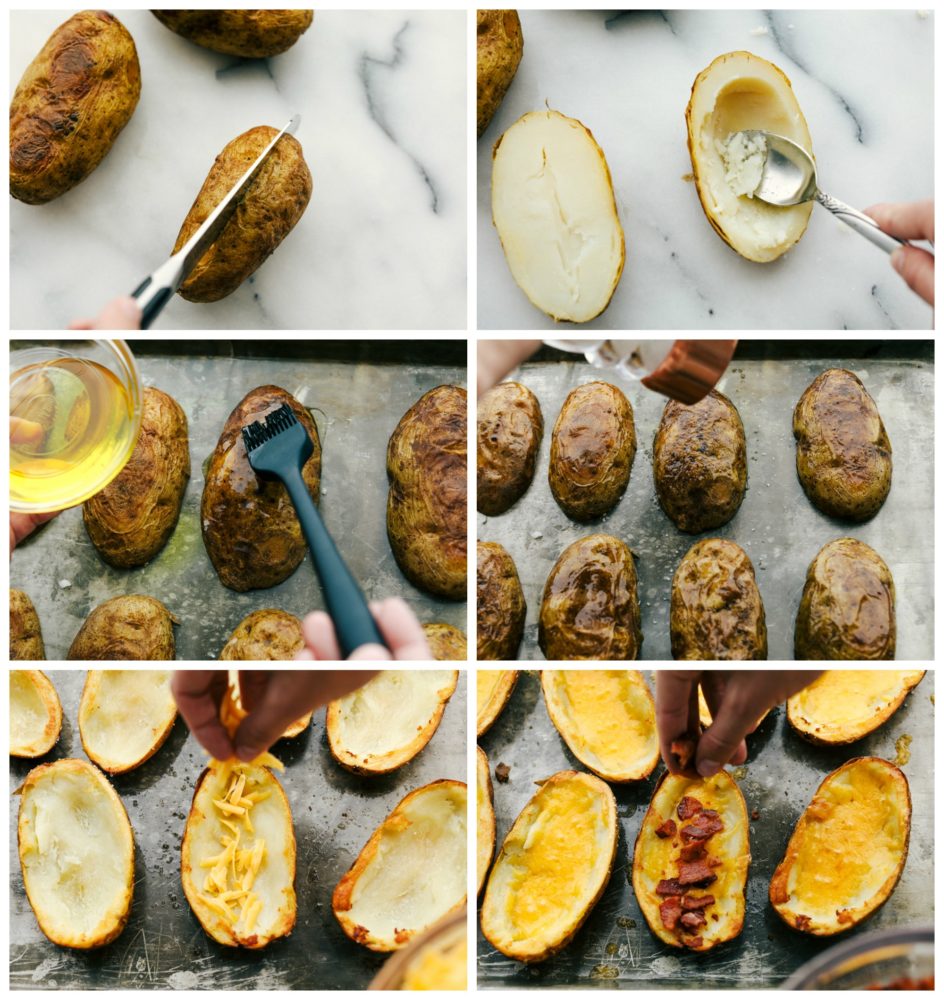
  1. Prepare Potatoes: Wash and scrub the potatoes. Preheat oven to 400 degrees.  Prick with a fork and bake for an hour or until tender.  Or cook in the microwave for 5 minutes each potato.  Let the potatoes cool to the touch.
  2. Bake: Cut the potatoes in half.  Scoop out the potatoes leaving about 1/4 inch along the sides.  Place the potatoes on a baking sheet skin side up and brush with olive oil.  Salt and pepper.  Bake for about 10 minutes.  Flip to the other side and bake an additional 10 minutes or until they start looking golden brown.
  3. Remove and Garnish: Remove from the oven and add the cheese.  Add back to the oven for 2-3 minutes until the cheese has melted.  Top with bacon, green onions and favorite toppings. 

The process of making potato skins.

Toppings for Baked Potato Skins:

Load your potato skins up with all your favorite toppings! Keep it simple with cheese and bacon or go all out with some of these choices.

  • Classic: Bacon, cheese and onions are always the favorite.
  • Taco Style: Ground beef with taco seasoning, cheese and garnished with cilantro.
  • Southern: Pulled pork with barbecue sauce.
  • Kid Approved: Sloppy Joe meat, cheese and chopped bun to top it off with.
  • Spicy Skins: Jalapeño poppers are a hot appetizer that makes a fun twist.

Tips for Making the Best Potato Skins:

Here are some quick and easy ways to make homemade crispy potato skins easier for you to make. These will turn out to be the best appetizer you make!

  • Size of Potatoes: It is best to choose large potatoes and russets if possible. These will be the strongest and hold up best when baked.
  • Cool: Let the potatoes cool completely before cutting into them. They will fall apart if they are cut too soon.
  • Cutting: Cut lengthwise on the potato skin. Carefully spoon out the inside of the potato. Leave about 1/4 inch of the potato to help for stability.
  • More recipes! Keep the hollowed potato parts for more recipes like this garlic ranch smashed potatoes or making mashed potatoes.

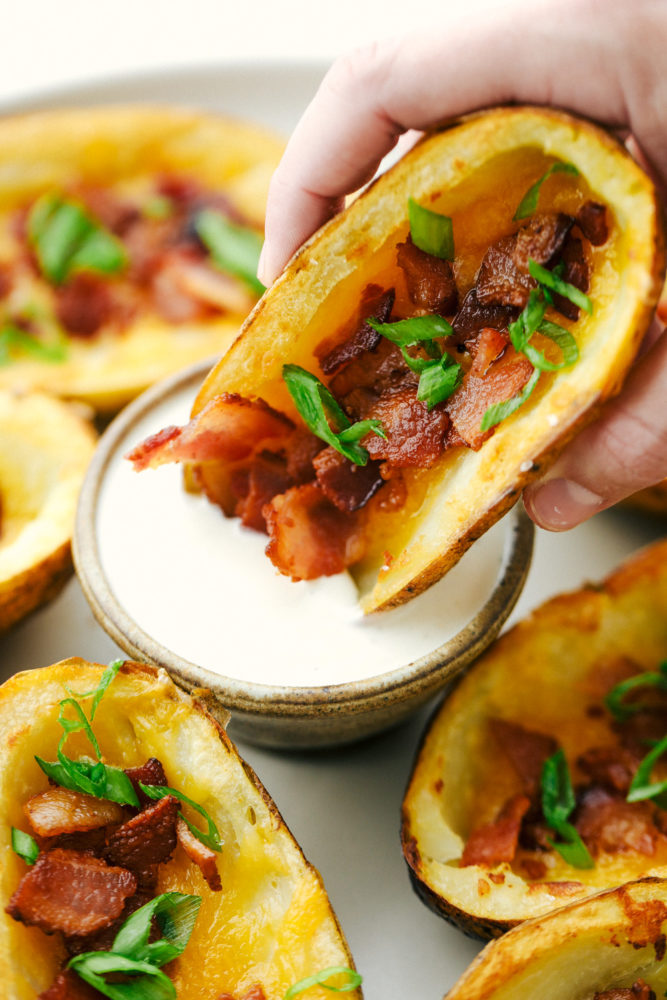
A potato skin being dipped in ranch sauce.

More Delicious Appetizers:

Print

Crispy Potato Skins

Baked Potato Skins have a crispy outer shell that is loaded with a cheddar cheese, bacon and green onion combination. These potatoes are everyones favorite appetizer or side dish! 
Course Appetizer, Side Dish
Cuisine American
Keyword crispy potato skins, loaded potato skins, potato skins
Prep Time 10 minutes
Cook Time 25 minutes
Total Time 35 minutes
Servings 8 Potato Skins
Calories 298kcal
Author Alyssa Rivers

Ingredients

  • 4 small Russet Potatoes
  • 2 Tablespoons olive oil
  • salt and pepper
  • 2 cups cheddar cheese shredded
  • 6 slices bacon chopped and cooked
  • green onions sliced
  • Ranch or sour cream for serving optional

Instructions

  • Wash and scrub the potatoes. Preheat oven to 400 degrees. Prick with a fork and bake for an hour or until tender. Or cook in the microwave for 5 minutes each potato. Let the potatoes cool to the touch.
  • Cut the potatoes in half. Scoop out the potatoes leaving about 1/4 inch along the sides. Place the potatoes on a baking sheet skin side up and brush with olive oil. Salt and pepper. Bake for about 10 minutes. Flip to the other side and bake an additional 10 minutes or until they start looking golden brown.
  • Remove from the oven and add the cheese. Add back to the oven for 2-3 minutes until the cheese has melted. Top with bacon, green onions and favorite toppings.

Nutrition

Calories: 298kcal | Carbohydrates: 20g | Protein: 11g | Fat: 19g | Saturated Fat: 9g | Cholesterol: 41mg | Sodium: 290mg | Potassium: 504mg | Fiber: 1g | Sugar: 1g | Vitamin A: 283IU | Vitamin C: 6mg | Calcium: 218mg | Iron: 1mg


from The Recipe Critic https://ift.tt/3lgcF0P
via babu31blog

Age-Reversal Tips: You Can Be Younger (How To Use The Power Of Your Mind to Look & Feel 10 Years Younger).

The way you look and feel have very little to do with your chronological age, and my guest on today's

The post Age-Reversal Tips: You Can Be Younger (How To Use The Power Of Your Mind to Look & Feel 10 Years Younger). appeared first on Ben Greenfield Fitness - Diet, Fat Loss and Performance Advice.


from Ben Greenfield Fitness – Diet, Fat Loss and Performance Advice https://ift.tt/3aNsVBB
via babu31